Otis FootPrint Maker Info
About
The Otis FootPrint Maker was designed to help illustrate small or personal camp layouts for those persons camping within a larger camp. It works to calculate the overall square footage that a camp layout may need or use, that persons footprint. This tool makes use of HTML5 <canvas> tag and JQuery Mobile Framework to generate and manipulate the basic shapes of common personal camp items or elements for the Burning Man event.
FAQs
Can I turn On or Off the gridlines?
Yes! Using the menu button in the upper left, a panel with options will appear. You can toggle gridlines on or off.
Can I turn On or Off the number markers?
Yes! Using the menu button in the upper left, a panel with options will appear. You can toggle number markers on or off.
Is there a way to add the Date and Time?
Yes! By default it is not shown. Using the Menu button in the upper left, you can then doggle the Date and Time. Or expand Text and add a label with the Date and Time you as you prefer.
Can I change the background color?
Yes! Using the menu button in the upper left, a panel with options will appear. Click the color box to change the background color.
Will the tool calculate the total Square Footage of all the items in the layout?
Yes! Expand the Text section, instead of typing anything in the field, Double Click on the text field. This will fill the field with "Total ft²: ##" where ## will be the total square footage of all the shapes in the layout. If you then add more items, you can repeat this. Click Add button to add the text to the layout.
How can I have the layout emailed to someone else?
When you hit Save, it will read whatever email address is set in the Email field and send a copy to that address. If you want to send your layout to someone else, change the email address and click Save. Clicking Add only adds that same data to the layout. It is not required.
Why can't I rotate a object on the layout?
Transforming the object in this way is difficult. Plans to be able to manipulate the items in the layout are being worked on for future revisions.
How can I delete a specific object on the layout?
Using your Mouse, click on the object to select it. You may see highlight in with a red border. Press the Delete key on your keyboard. You will be prompted to confirm that you want to delete the object. Click Ok and the object will be removed from your layout. You can also use Clear All or use Delete Last buttons.
What is the extra text file that gets sent to me when I Save?
This is a JSON file containing all the details to of the items you have placed in your layout. At a later date, you will be able to import this file in to the FPMaker and rebuild your layout and edit it if needed. In addition, the file can be given to your Camp layout designer, and they can use it to add your items to a Camp Layout.
Tutorials
Importing FootPrint
Adding Tents
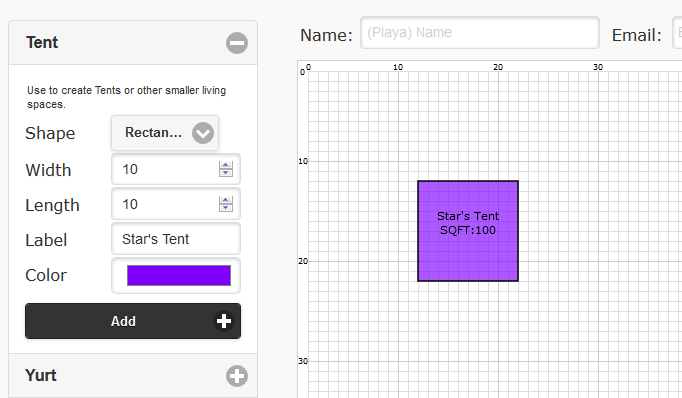
On the left hand side, expand the Tents section. You will have 5 options for a square or rectangular shaped tent and 4 options for a hexagonal shaped tent.
For this example, we will create a tent that is roughly 10 feet wide and 10 feet long. This will be labeled Star's Tent and will set it to a deep purple color.
- Select a Shape: Rectangle
- Set the Width: 10
- Set the Length: 10
- Enter the Label: Star's Tent
- Click the color box.
- A color dialog box will appear, select a deep purple color and press Ok
- Click Add to add the tent to the canvas
The tent is now added to the canvas and you can move around as you need by clicking within it's borders. You can now add another tent, adjust the settings as desired to fit your tent!
Adding a Yurt
When you expand the section title Yurt, you have 3 options. Yurts are created by setting the size of one of it's sides. A Hexayurt for example generally has an eight foot wall, so the side would be 8.
For this example, we will create a yurt that has 8 foot walls. Will be labeled Sunshine's Yurt and will be a silver color.
- Set the Side: 8
- Enter a Label: Sunshine's Yurt
- Click the color box.
- A color dialog box will appear, select a silver color and press Ok
- Click Add to add the yurt to the canvas
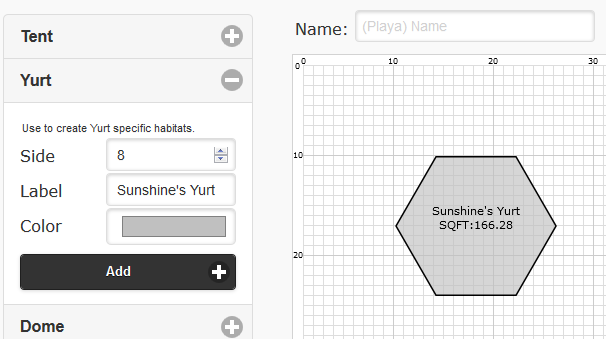
You will now have a yurt on your canvas that can be moved around. You can see the yurt is roughly 16 feet at it's widest, and 14 feet across.
Return to TopAdding a Dome
The dome only offers three settings. Since a Dome does not really have sides, we use the radius length to define it's size. The radius is the measurement from the center of the dome to it's vertices. Another way to think of it is half the widest part.
For this example, we will make a 40 foot wide dome. We will label it Thunder Dome! and make it a red color.
- Set the Radius: 20
- Enter a Label: Thunder Dome!
- Click the color box.
- A color dialog box will appear, select a red color and press Ok
- Click Add to add the dome to the canvas
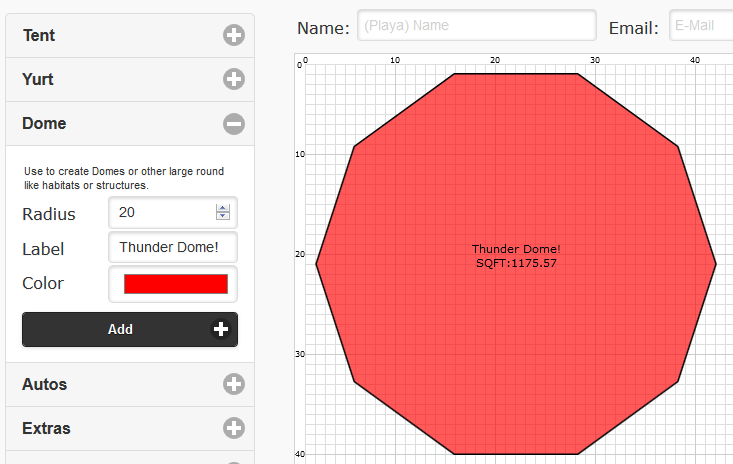
What you do with your dome is up to you.
Return to TopAdding Autos
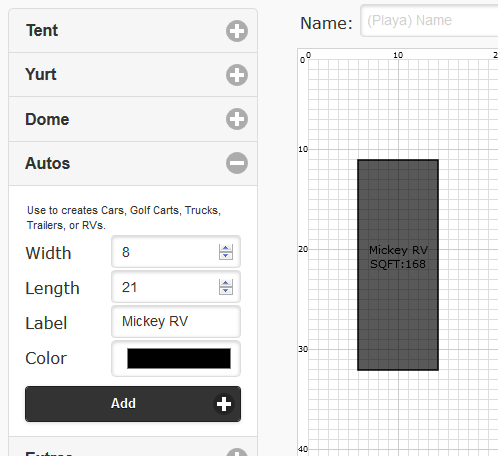
The section for Autos is designed to allow you to create cars, trucks, golf carts, trailers... most any automobile things. Cars and trucks are generally only 6 feet wide. RVs and other larger trucks are 8 feet wide.
For this example, we will make an RV that is 8 feet wide and 21 feet long. We will label it Mickey RV and color it black.
- Set the Width: 8
- Set the Length: 21
- Enter the Label: Mickey RV
- Click the color box.
- A color dialog box will appear, select black and press Ok
- Click Add to add the tent to the canvas
Adding Extras
Extras are things that don't really fit. Shade, carports, shower ponds, and whatever else you might think of. When you add items to the canvas, the first item will be the lowest. So to add shade, and have it appear over other items, add it last.
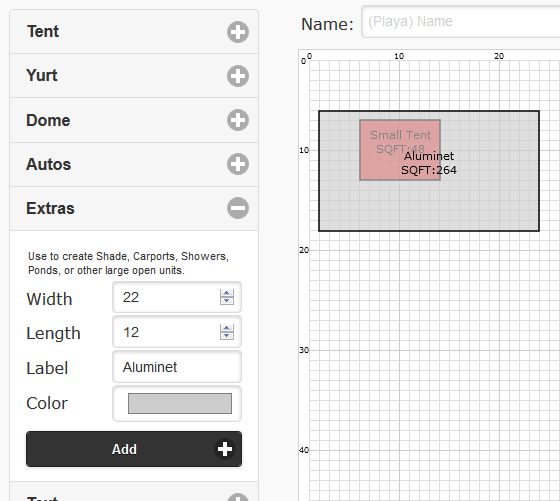
For this example, we will add a small tent, and then add a 12 foot by 22 foot shade unit over it. We will label it Aluminet and use the default gray color.
- Add a tent to your canvas
- Expand Extras
- Set the Width: 22
- Set the Length: 12
- Set the Label: Aluminet
- Click Add to add the shade unit
- Using your mouse, click and hold on Aluminet and drag it over the tent
Adding your Name and Email
If you wish to add your Name and Email to the layout, so that it's easy to identify when looking at the image, enter your name and email in the two fields across the top. Click Add to place the text in the Layout. You can drag it around like other objects so that it's not in the way.
Remember you do not have to add these details to your image, it's just a good practice. When using the Save button to save the image, only the Email field is required to be filled in.
Return to TopAdding Text
Return to TopDragging an Object
Using your mouse, you can click and hold on an object. You will see the object become highlights with a red border. Moving the mouse will drag the object along with your cursor.
Return to TopNudging an Object
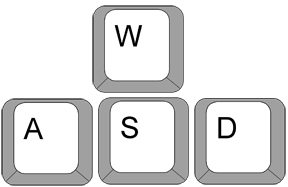
When a shape or object is selected, you can press the 'A', 'D', 'W', and 'S' keys on your keyboard to nudge the object. Use 'A' to nudge object Left. Use 'D' to nudge objects Right. Use 'W' to nudge objects Up. Use 'S' to nudge objects Down.
For this example, we will add a tent, select it, and nudge it to the right.
- Add a tent
- Using your mouse, click on the tent
- You will see the tent is highlighted with a red border - On your keboard, press and hold the 'D' key
- When the object is where you want it, depress the 'D' key.
- Using your mouse, click somewhere else on the canvas to unselect the object
The tent will move to the right on the screen. You can press the key once or hold it down to move it.
Return to TopRotate
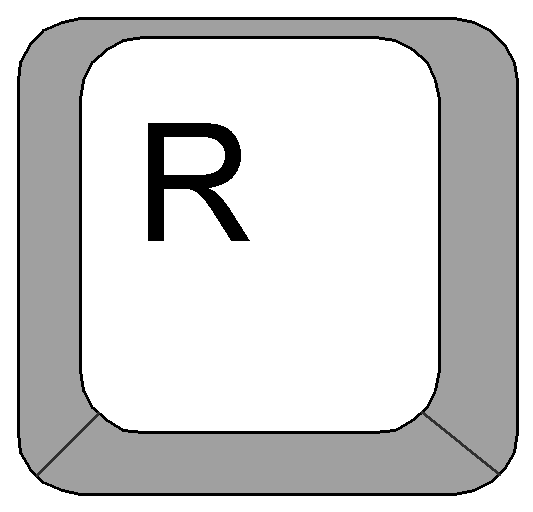
When a shape or object is selected, you can press the 'R' key or 'Rotate' button to rotate that shape.
Rick-Click Image to Save As...
Using your mouse, you can Right-Click on the canvas to bring up a contextual menu. On a Mac, press and hold the 'Ctrl' key and click on the canvas.
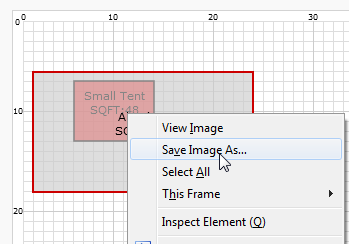
Depending on your browser this will look diffrerntly. Select 'Save Image As...' and you will be prompted to save the image on your computer.
Return to TopSave Button
To Save your layout, make sure that your Name and Email are entered in the fields (you do not have to click Add) and click the Save button. This will upload a copy of the image and email to the address specified. You will also get a notification below that you can click on to view the image.
Return to TopExport Button
At this time, this feature is not available.
Return to TopImport Button
Use this feature to import the Export data contained in your save email to import your camp elements to the layout. They will then be editable again.
Return to TopChange Log
Jul 22 2015 - Version 1.6
Added Rotate feature. Select Rect Tent, Auto, or Shade and press 'R' key to rotate.
Jun 17 2015 - Version 1.5
Added Import feature.
Updated Email to include more details of Export text.
Started Change Log
Jun 12 2015 - Version 1.4
Fixed Clear All, Delete Last, and 'Delete' functions to properly remove items from layout.
Began including JSON Export of shapes in Save Email
Added 'Label' feature.
Fixed bug with Hex creation, removed rotating creation.
Jun 10 2015 - Version 1.2
Fixed creation of Hex Tents, Yurts, and Domes.
Fixed bug causing gridlines to grow when object added to layout and selected.
Jun 08 2015 - Version 1.1
Fixed bug causing gridlines to appear large
Jun 05 2015 - Version 1.0
Initial creation.
Added ability to add Rect Tents, Autos, and Shade.
Return to Top